Building a Custom Wooden Controller: CNC, ESP32
The Idea
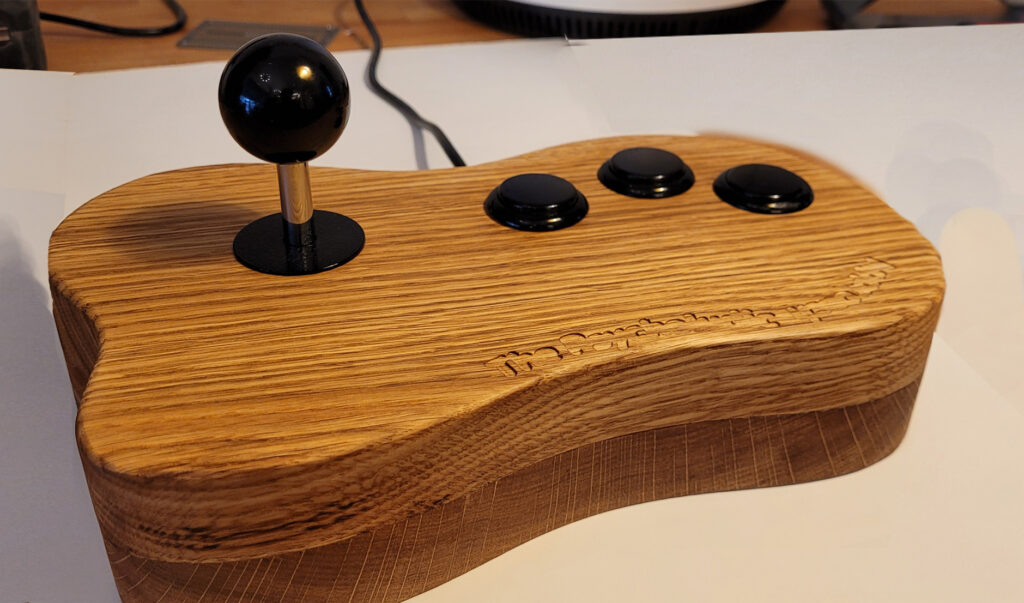
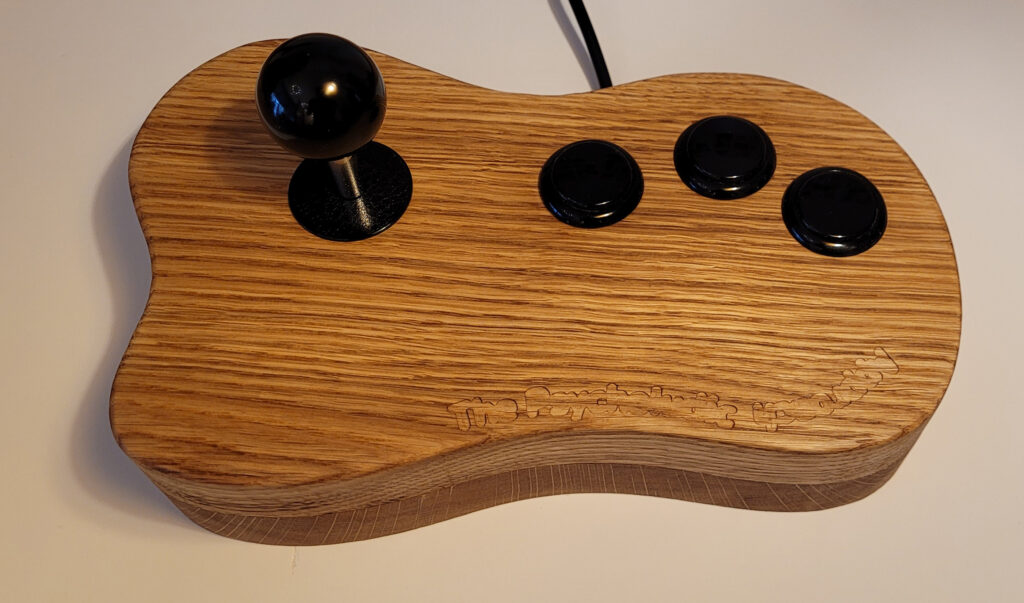
I wanted a controller with a high-quality joystick, three buttons, and a solid wood body—something ergonomic, durable, and aesthetically pleasing. Instead of using plastic, I opted for wood for a natural feel and long-lasting build.
CNC Machining and Design
The design process started with precise modeling to ensure a comfortable grip. Using a CNC machine, I carved out the enclosure, keeping tolerances tight for the joystick and buttons. The goal was a smooth, well-fitted assembly with minimal post-processing.
Electronics and Integration
The joystick and buttons connect to an ESP32, which handles input processing and communicates with the computer. Wiring was kept clean, ensuring reliability. The ESP32’s wireless capabilities also allow for future upgrades if needed.
Finishing and Assembly
After CNC carving, I fine-sanded the wood for a smooth touch and applied a natural oil finish for durability. Once dried, the components were mounted, and the controller was tested. The result: a custom, functional wooden controller that balances form and function.
Next Steps
This build opens possibilities for further refinements—adjusting ergonomics, trying different woods, or exploring wireless functionality. For now, it’s a working, handcrafted controller that feels great to use.
Building a Custom Wooden Controller: CNC, ESP32
The Spark of Innovation
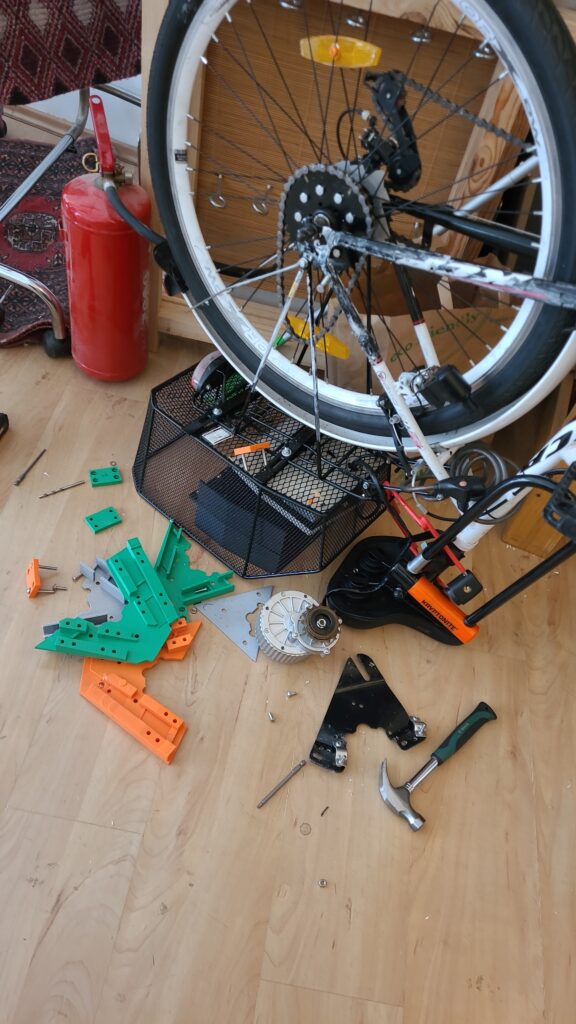
The idea struck me to convert my bike into an electric powerhouse. Armed with a 150 Euro motor and a thirst for innovation, I set out on this DIY journey.
From Scans to Design: Iterations Galore
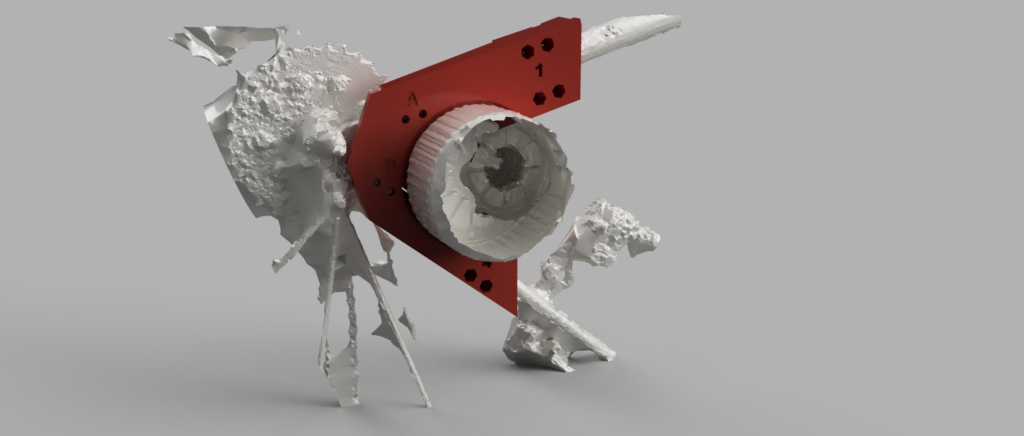
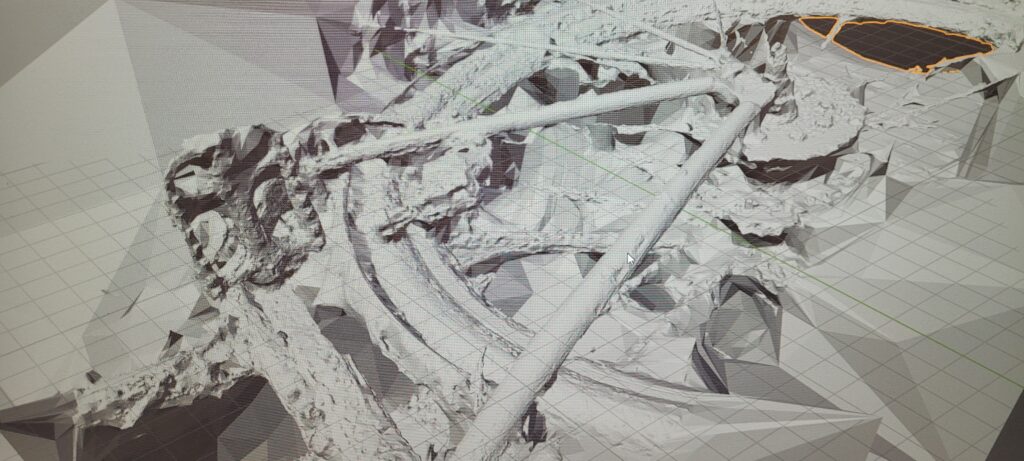
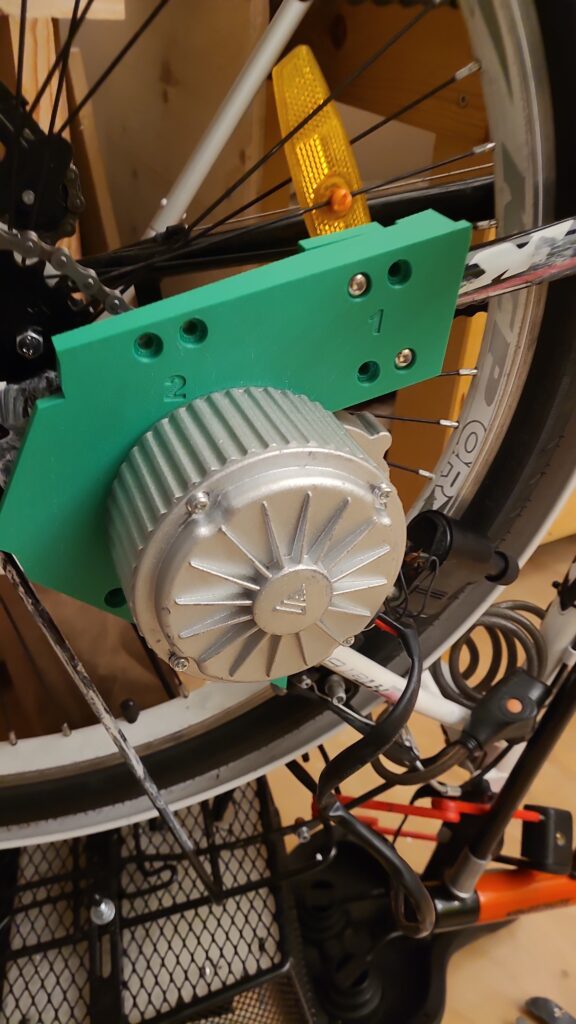
Utilizing reality capture and my smartphone, I meticulously scanned both the bike frame and the motor. Through 15 iterations of design, I honed in on the perfect fit for the frame, facing challenges along the way. Each tweak brought me closer to the seamless integration I envisioned.
Bringing Designs to Life: Prototyping with Precision
Using my 3D printer, I crafted PLA prototypes to fine-tune the design before transitioning to ASA for enhanced durability. The process was a labor of love, with each layer adding to the excitement of seeing my vision materialize.
The Road Ahead
With the bracket in hand, crafted through countless hours of dedication and innovation, I stand on the brink of a new chapter in biking adventure. From humble beginnings to a high-powered transformation, the journey has been nothing short of exhilarating.
Stay tuned for the electrifying ride that awaits!
Converting my Bike into an Electric Bike: The Journey of 3D Printing a Bracket
From Inspiration to Creation
Inspired by a myriad of online tutorials, I embarked on an ambitious project: to bring to life an animatronic raven. Using Fusion 360 for the design, and a combination of servo motors, 3D printing, wires, and feathers, my goal was to create not just a mechanical bird but a personal assistant with a twist – one that could interact using ChatGPT, powered by a Raspberry Pi and a microphone. This prototype was made in my function as researcher on the project The Psycholudic Approach at the University Of Applied Arts Vienna.
The Challenge of Realism
The most challenging part of this endeavor wasn’t the electronics or the coding; it was the feathers. Achieving the sleek, dark elegance of a raven’s plumage proved more difficult than anticipated. Initially, my attempts resulted in something that resembled a chicken more than the intended raven. The texture, the color, the density – every aspect needed careful consideration to avoid a poultry faux pas.
Integration and Interaction
Integrating the animatronic raven with ChatGPT was a journey into the unknown. The Raspberry Pi served as the brain, allowing real-time interaction and enabling the raven to become a personal assistant. With a microphone incorporated, it was designed to listen and respond, bringing a unique attitude to daily interactions. This wasn’t just about creating a robotic bird; it was about crafting a companion, one with the capability to surprise and engage in meaningful ways.
Feathers: The Final Frontier
Mastering the art of applying feathers was a painstaking process. Each feather had to be carefully selected, trimmed, and attached to convey the authentic look and feel of a raven’s plumage. This meticulous process was critical in transforming a 3D-printed structure into a lifelike creature. The distinction between a convincing raven and a chicken imposter lay in the details of this featherwork.
Conclusion: A Raven Reborn
The journey to create an animatronic raven was filled with challenges and learning opportunities. From design and mechanics to the final feathered touches, every step was a lesson in patience, precision, and persistence. The result? A personal assistant unlike any other, ready to interact with a hint of avian attitude. This project was a reminder that in the realm of creation, it’s the unexpected hurdles that often lead to the most innovative solutions.
Crafting a Raven: An Animatronic Assistant
Starting the Setup
In the universe of DIY and making things by hand, combining Raspberry Pi 2 W with Arduino opens many doors. My recent adventure involved making Raspberry Pi 2 W talk to Arduino, and this process, it was smooth and full of joy.

SSH Magic
For the beginning, I set up Raspberry Pi 2 W to work without its own screen or keyboard. Using SSH (Secure Shell), I could program and control it from another computer in my network. This way of doing things made the work more tidy and gave me freedom in my workspace.
Mini Monitor, Big Fun
A very special part was adding a tiny monitor that can mount on the Raspberry Pi. This small thing changed a lot, giving a direct look at what’s happening without a big monitor. It was practical and added fun to my project, making interactions with the device more direct and playful.
Arduino Integration
Bringing Arduino into the mix with Raspberry Pi 2 W was like combining best friends – Raspberry Pi’s brainy powers with Arduino’s ability to feel and control the world. This combination allowed for cleverer and more together electronics projects, easy enough for beginners but still interesting for those who know more.
Reflections on Making
Looking back, it’s amazing how making integrated electronics is now a thing of joy and not just hard work. Today, with tools like Raspberry Pi and Arduino, anyone with a bit of curiosity and patience can bring complex ideas to life. The simplicity of programming and the magic of controlling these devices from afar open a world of creativity and new ideas in DIY electronics.
Raspberry Pi 2 W Meets Arduino: A Fun Journey
Wireless Wonders
Wireless power isn’t just for our phones anymore. My latest tinkering takes this marvel into the realm of wood, embedding electronics to create enchanting luminous effects. Imagine wood, so still and silent, suddenly aglow – magic?
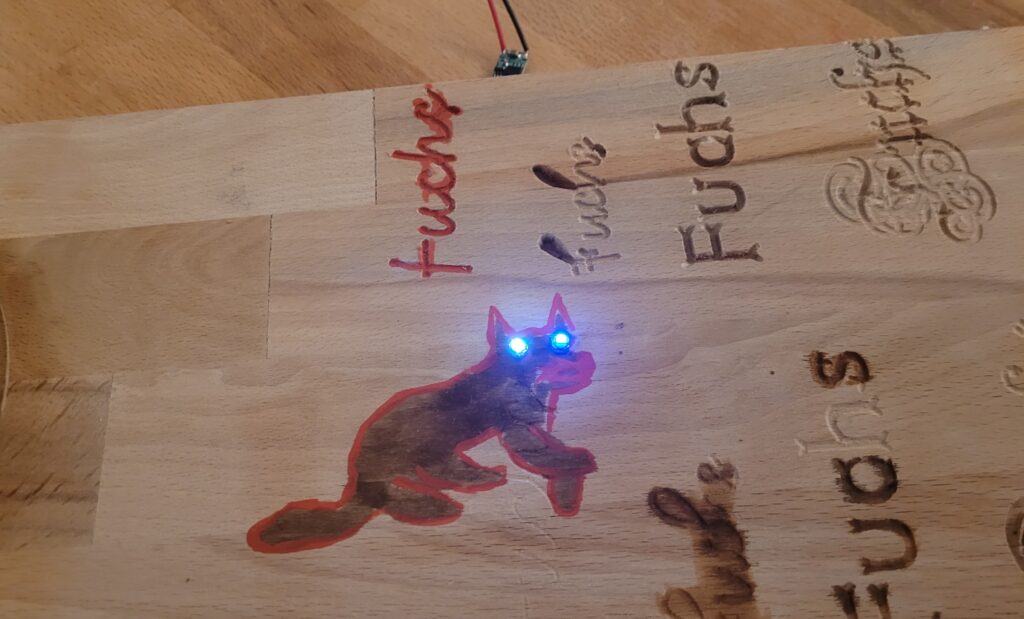
Unexpected Glow
The heart of the experiment? Wireless LEDs. No wires, no visible power source, just the warm, unexpected light emerging from within the wood. It challenges what we expect from materials as old and as natural as wood, turning ordinary objects into sources of wonder. At the heart of this enchanting experiment are coils, discreetly nestled within the wood. These coils are the secret to transferring power without wires, enabling LEDs embedded in the wood to light up as if by magic.
Touch and See
This journey into wireless power and LEDs is more than a technical challenge; it’s about playing with the tactile and visual expectations. Wood, known for its solidity and quiet beauty, now surprises us, lighting up our surroundings in a way that feels like magic.
Brief Conclusion
Experimenting with wireless power in wood has opened a new chapter in how we interact with our environment. It’s a reminder that even the most traditional materials can become conduits for innovation and magic, creating moments of joy and wonder in our everyday lives.
Magic in the Wood: Wireless LEDs
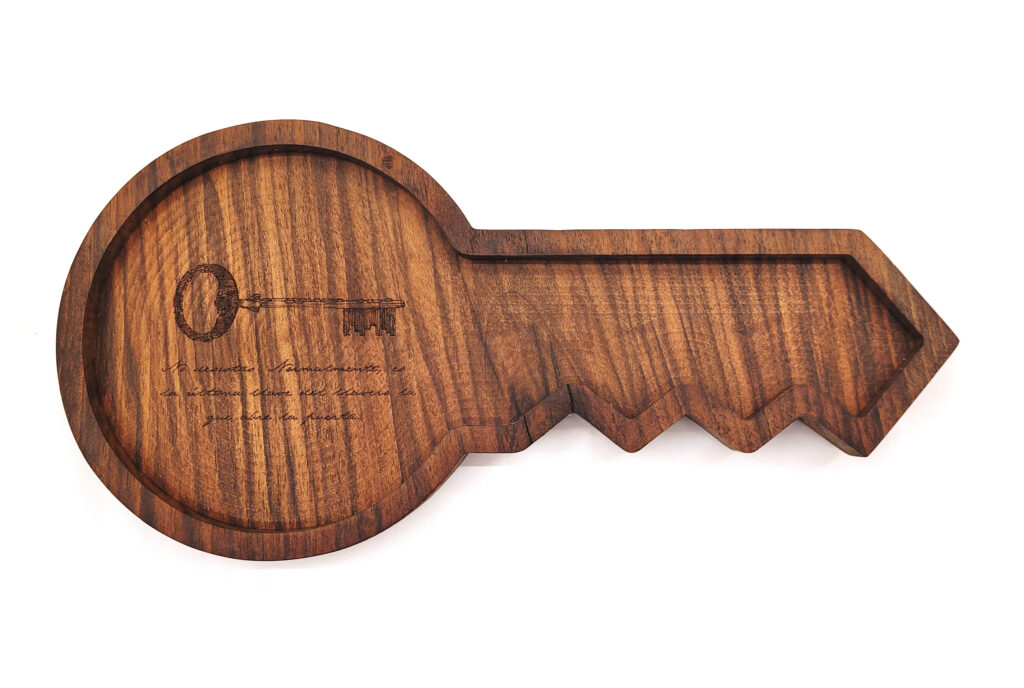
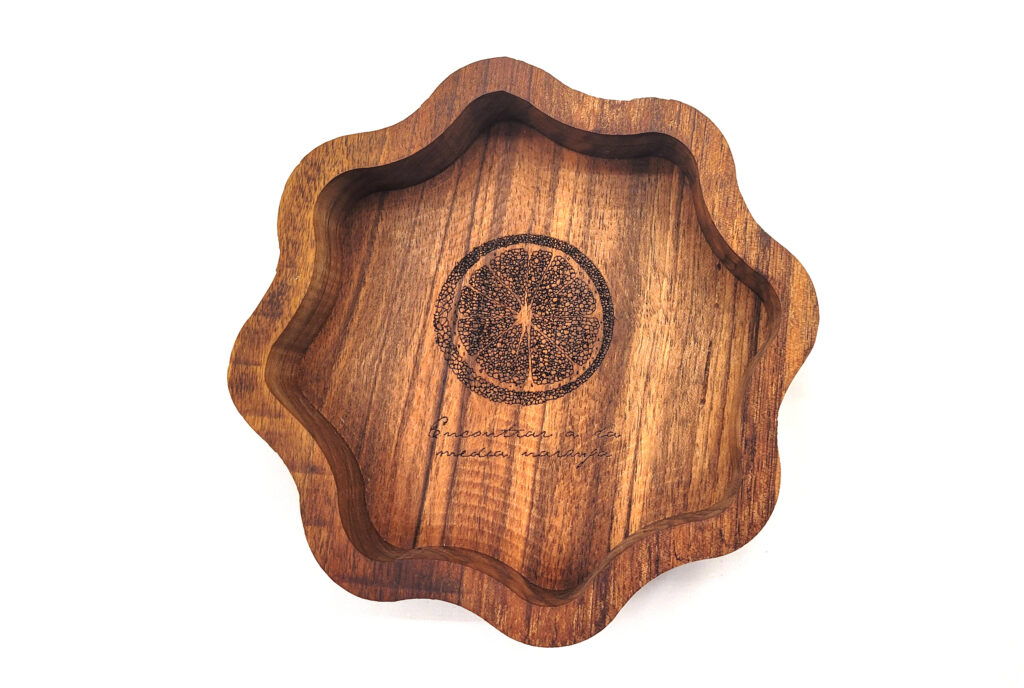
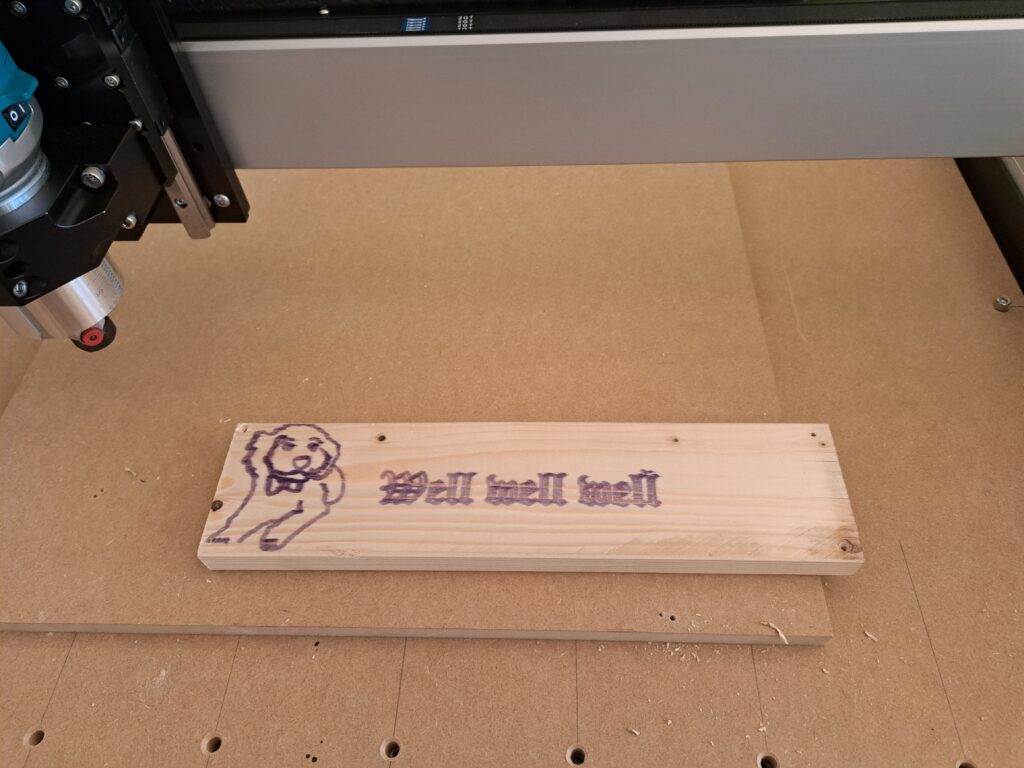
To create personalized controllers, I acquired a Shapeoko CNC machine capable of working with various materials like wood and acrylics. Combining this with a laser cutter, I engraved text onto the wooden surfaces. Additionally, I utilized the machine to craft intricate components for small furniture items.
To further enhance my projects, I also explored the integration of electronics with the wooden interfaces. This combination would add an extra layer of functionality to my custom controllers, elevating their design and utility. It is my goal to blend the warmth of natural materials with the sophistication of modern electronics.
The Shapeoko 4 XXL is a powerful desktop CNC machine that allows both hobbyists and professionals to create intricate projects. However, setting up this impressive machine requires some thought and effort.
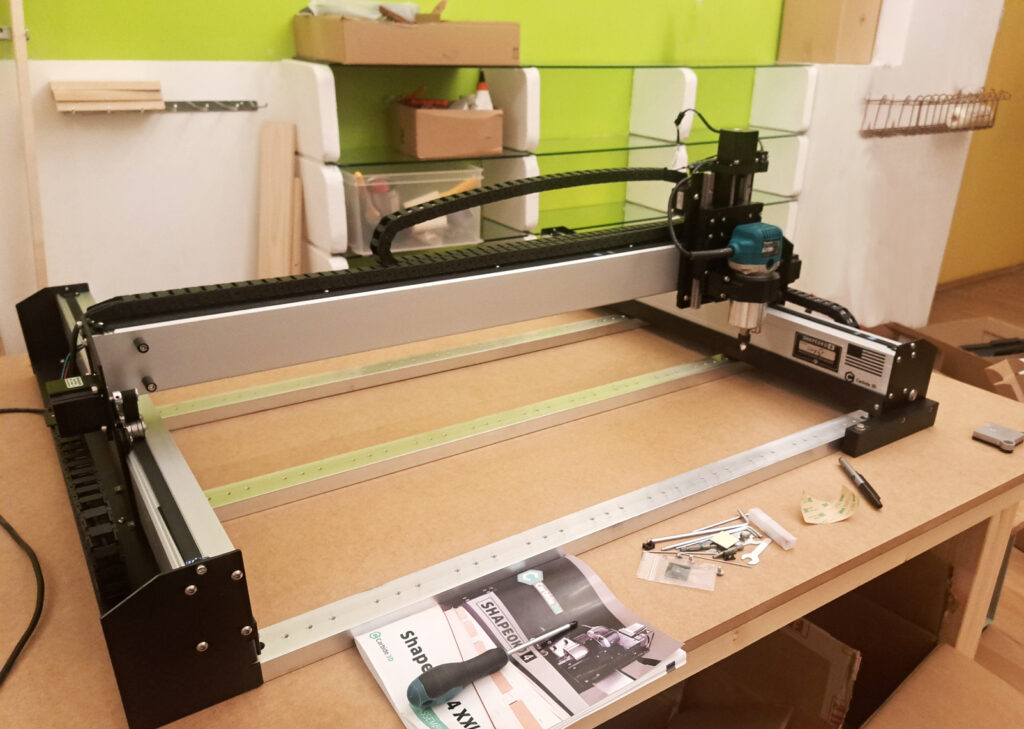
The Shapeoko is a large machine, and it requires a strong, stable surface to operate effectively. Building a custom wooden table provided the ideal foundation for the CNC machine. Here’s what I needed to consider:
High density MDF for the tabletop for durability and excellent vibration absorption.
Reinforcement of the table with sturdy legs and cross-bracing. This will help to keep the table stable and reduce the chance of movement during operation.
Dimensions of the table. Ensuring that there’s enough space to accommodate the entire CNC, as well as any additional equipment I may need.
Noise during operation – which could be a concern for the neighbors. Therefore the idea is, in addition to adding rubber feet to machine, building a soundproof enclosure.
Adequate lighting – an LED strip and webcam will be placed inside the enclosure for optimal safety and precision.
CNC Experiments
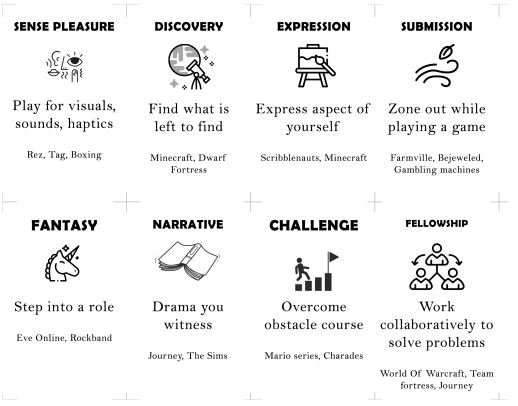
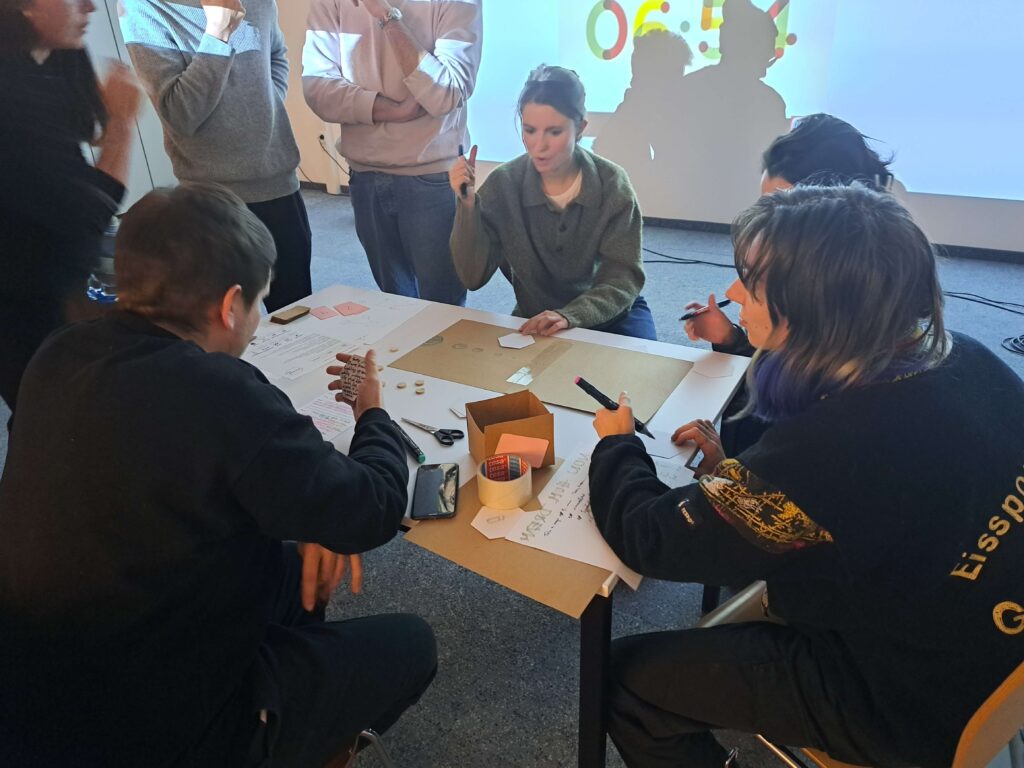
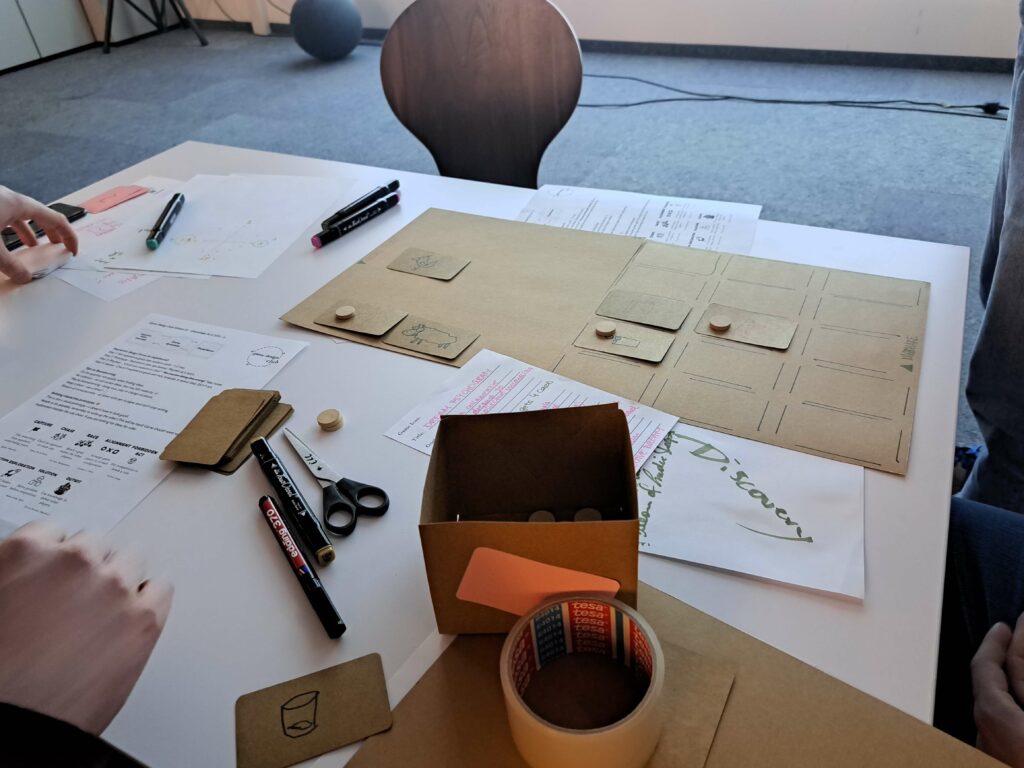
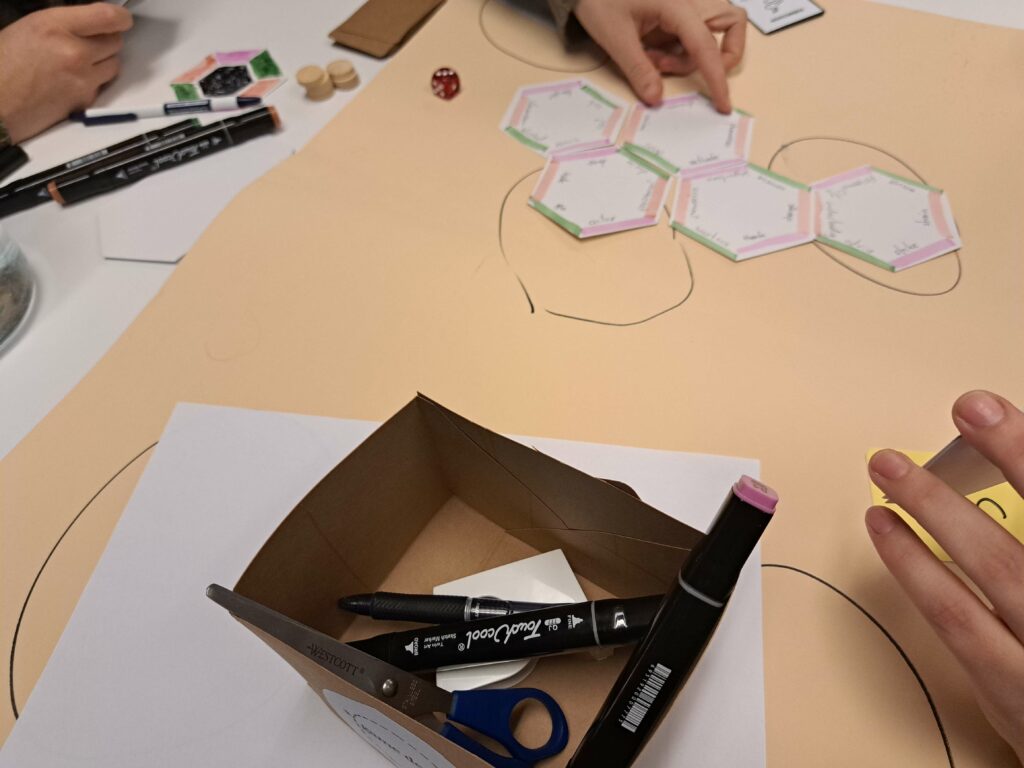
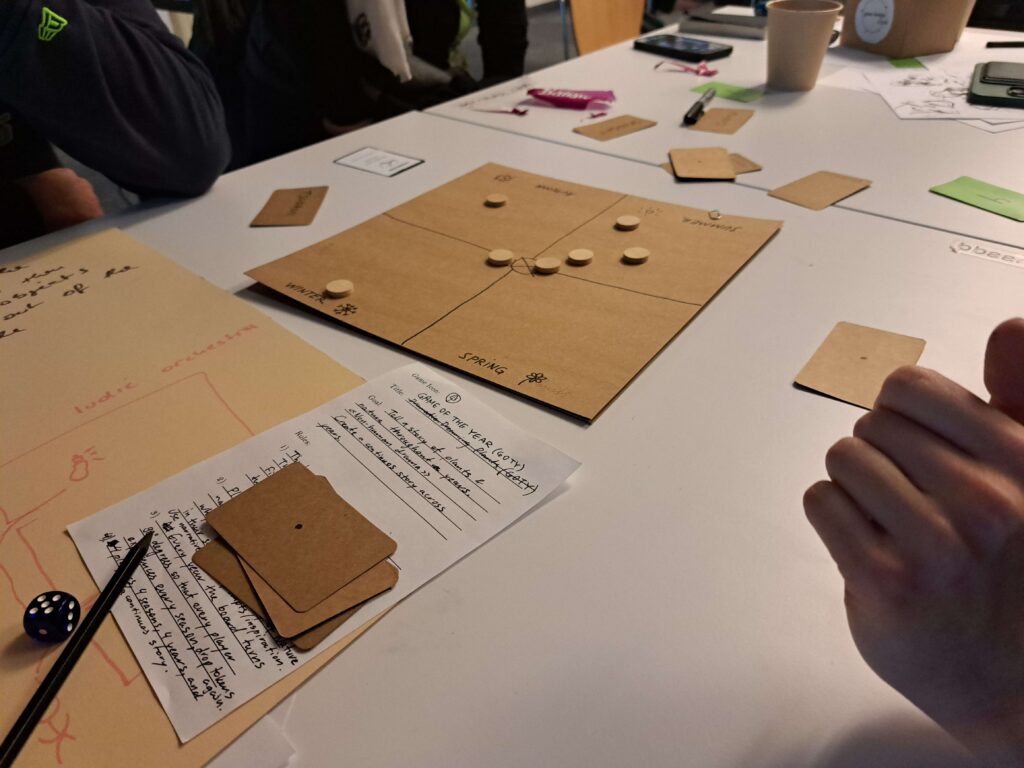
As a part of my role as university assistant at the Experimental Game Cultures department @ University Of Applied Arts Vienna I created the first edition of our Game Design Club. In these sessions, the students create playable prototypes after an introductory talk about game design methodology, a discussion of different design mindsets and analysis of existing games.
This is a hands-on collaboration, we playtest each others projects and iterate on our ideas.
The sessions themselves are playful and have constraints/rules. These are set in place in order to facilitate creativity and avoid blank-page paralysis. For the theoretical part of these sessions we look at chapters from such books as “Game Design Workshop”, “A Theory Of Fun For Game Design”, “Rules Of Play”, “The Art Of Game Design”, and many more.
The main goals of these practical get togethers are:
Gaining confidence in the methodology of game design
Discussing different design mindsets
Creating playable prototypes
Playtesting & Iterating on ideas
Game Design Club @ Experimental Game Cultures
A recent prototype included the building of a live polling app to use for live-feedback in presentations:
One of the pages is for entering data and uses the “fingerprint” of the browser to remember who posted the data. The second page is to display the results from an internal JSON file.
The technologies used are PHP and Javascript, libraries include JQuery, Chart.js, Bootstrap.
Live Polling App
A recent experiment – the goal was to connect a physical device (in this case, the Raspberry Pi Pico W) to the internet and send data to a database. Everything is coded from scratch, to allow for most flexilibility.
The Raspberry Pi connects to the local Wifi (could therefore also be run with a battery) and collects data. After a certain amount of time it calls a URL to send the data. On this website a Server running Express and Node awaits – it then stores the data to a database.
What you can see below is a data file that shows several entries made by the Raspberry:
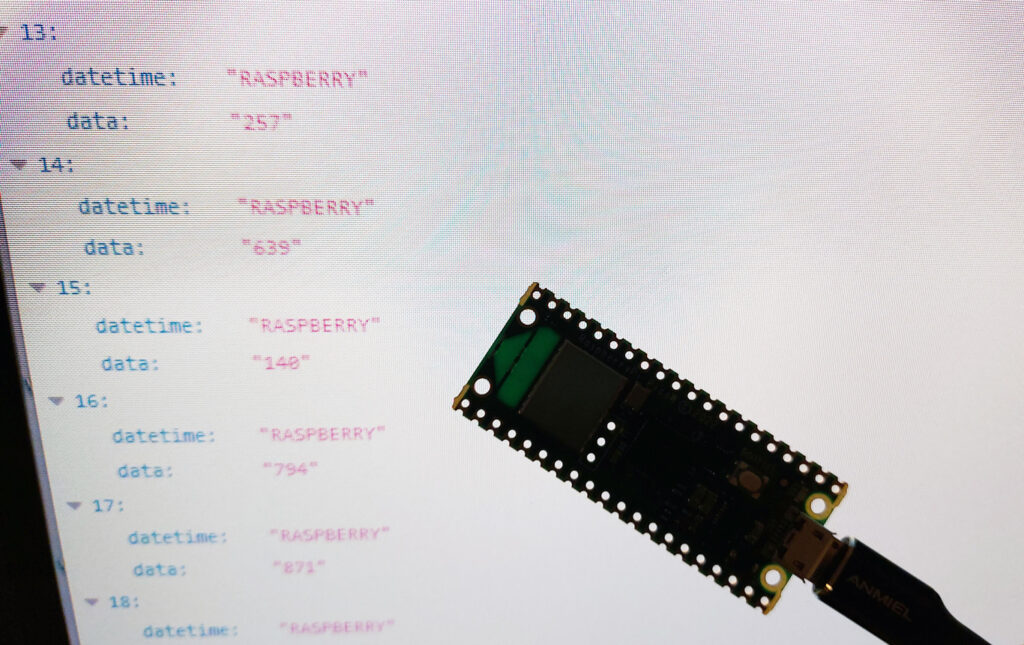
This could have several uses, but the main function I see is collecting data in the physical space to storing it securily on the cloud.
Raspberry To Database
The development of this prototype spanned over the course of several weeks.
The goal was to make a Virtual Reality game that connects to a custom made physical controller.
Step 1 – Connection between Arduino & Unity Android app
This was pretty straightforward, using a Bluetooth chip, I was able to connect my Android phone to the Arduino board. The simple input was a potentiometer.

Step 2 – Build a custom controller prototype
For this next step I wanted to create a more durable, portable prototype that could be carried around and had two buttons to press.


Step 3 – Ideate core mechanics of gameplay

Next, I wanted to find the core loop of the game.
You can control the time of day in a prehistoric environment with a physical interface (potentiometer). When you make it daytime the population (cavemen) will start gathering wood. When it’s night, they will retreat to their cave and burn wood to stay warm, as well as reproduce. The goal of the experience is to balance resource gathering and risking being eaten by tigers (if they chop wood for too long).